https://github.com/uzh-rpg/rpg_e2vid
@Article{Rebecq19cvpr, author = {Henri Rebecq and Ren{\'{e}} Ranftl and Vladlen Koltun and Davide Scaramuzza}, title = {Events-to-Video: Bringing Modern Computer Vision to Event Cameras}, journal = {{IEEE} Conf. Comput. Vis. Pattern Recog. (CVPR)}, year = 2019 }
Dependencies
- Pytorch ≥ 1.0
- Numpy
- Pandas
- OpenCV
Install with Anaconda
conda create -n E2VID conda activate E2VID # 아래 버전은 CPU 기본인 버전이라고 한다. 새로 cuda, torch를 깔아야 한다. conda install pytorch torchvision cudatoolkit=10.0 -c pytorch conda install pandas conda install -c conda-forge opencvconda create -n E2VID_test conda activate E2VID_test conda install pytorch torchvision torchaudio pytorch-cuda=11.6 -c pytorch -c nvidia conda install pandas scipy conda install -c conda-forge opencvRun
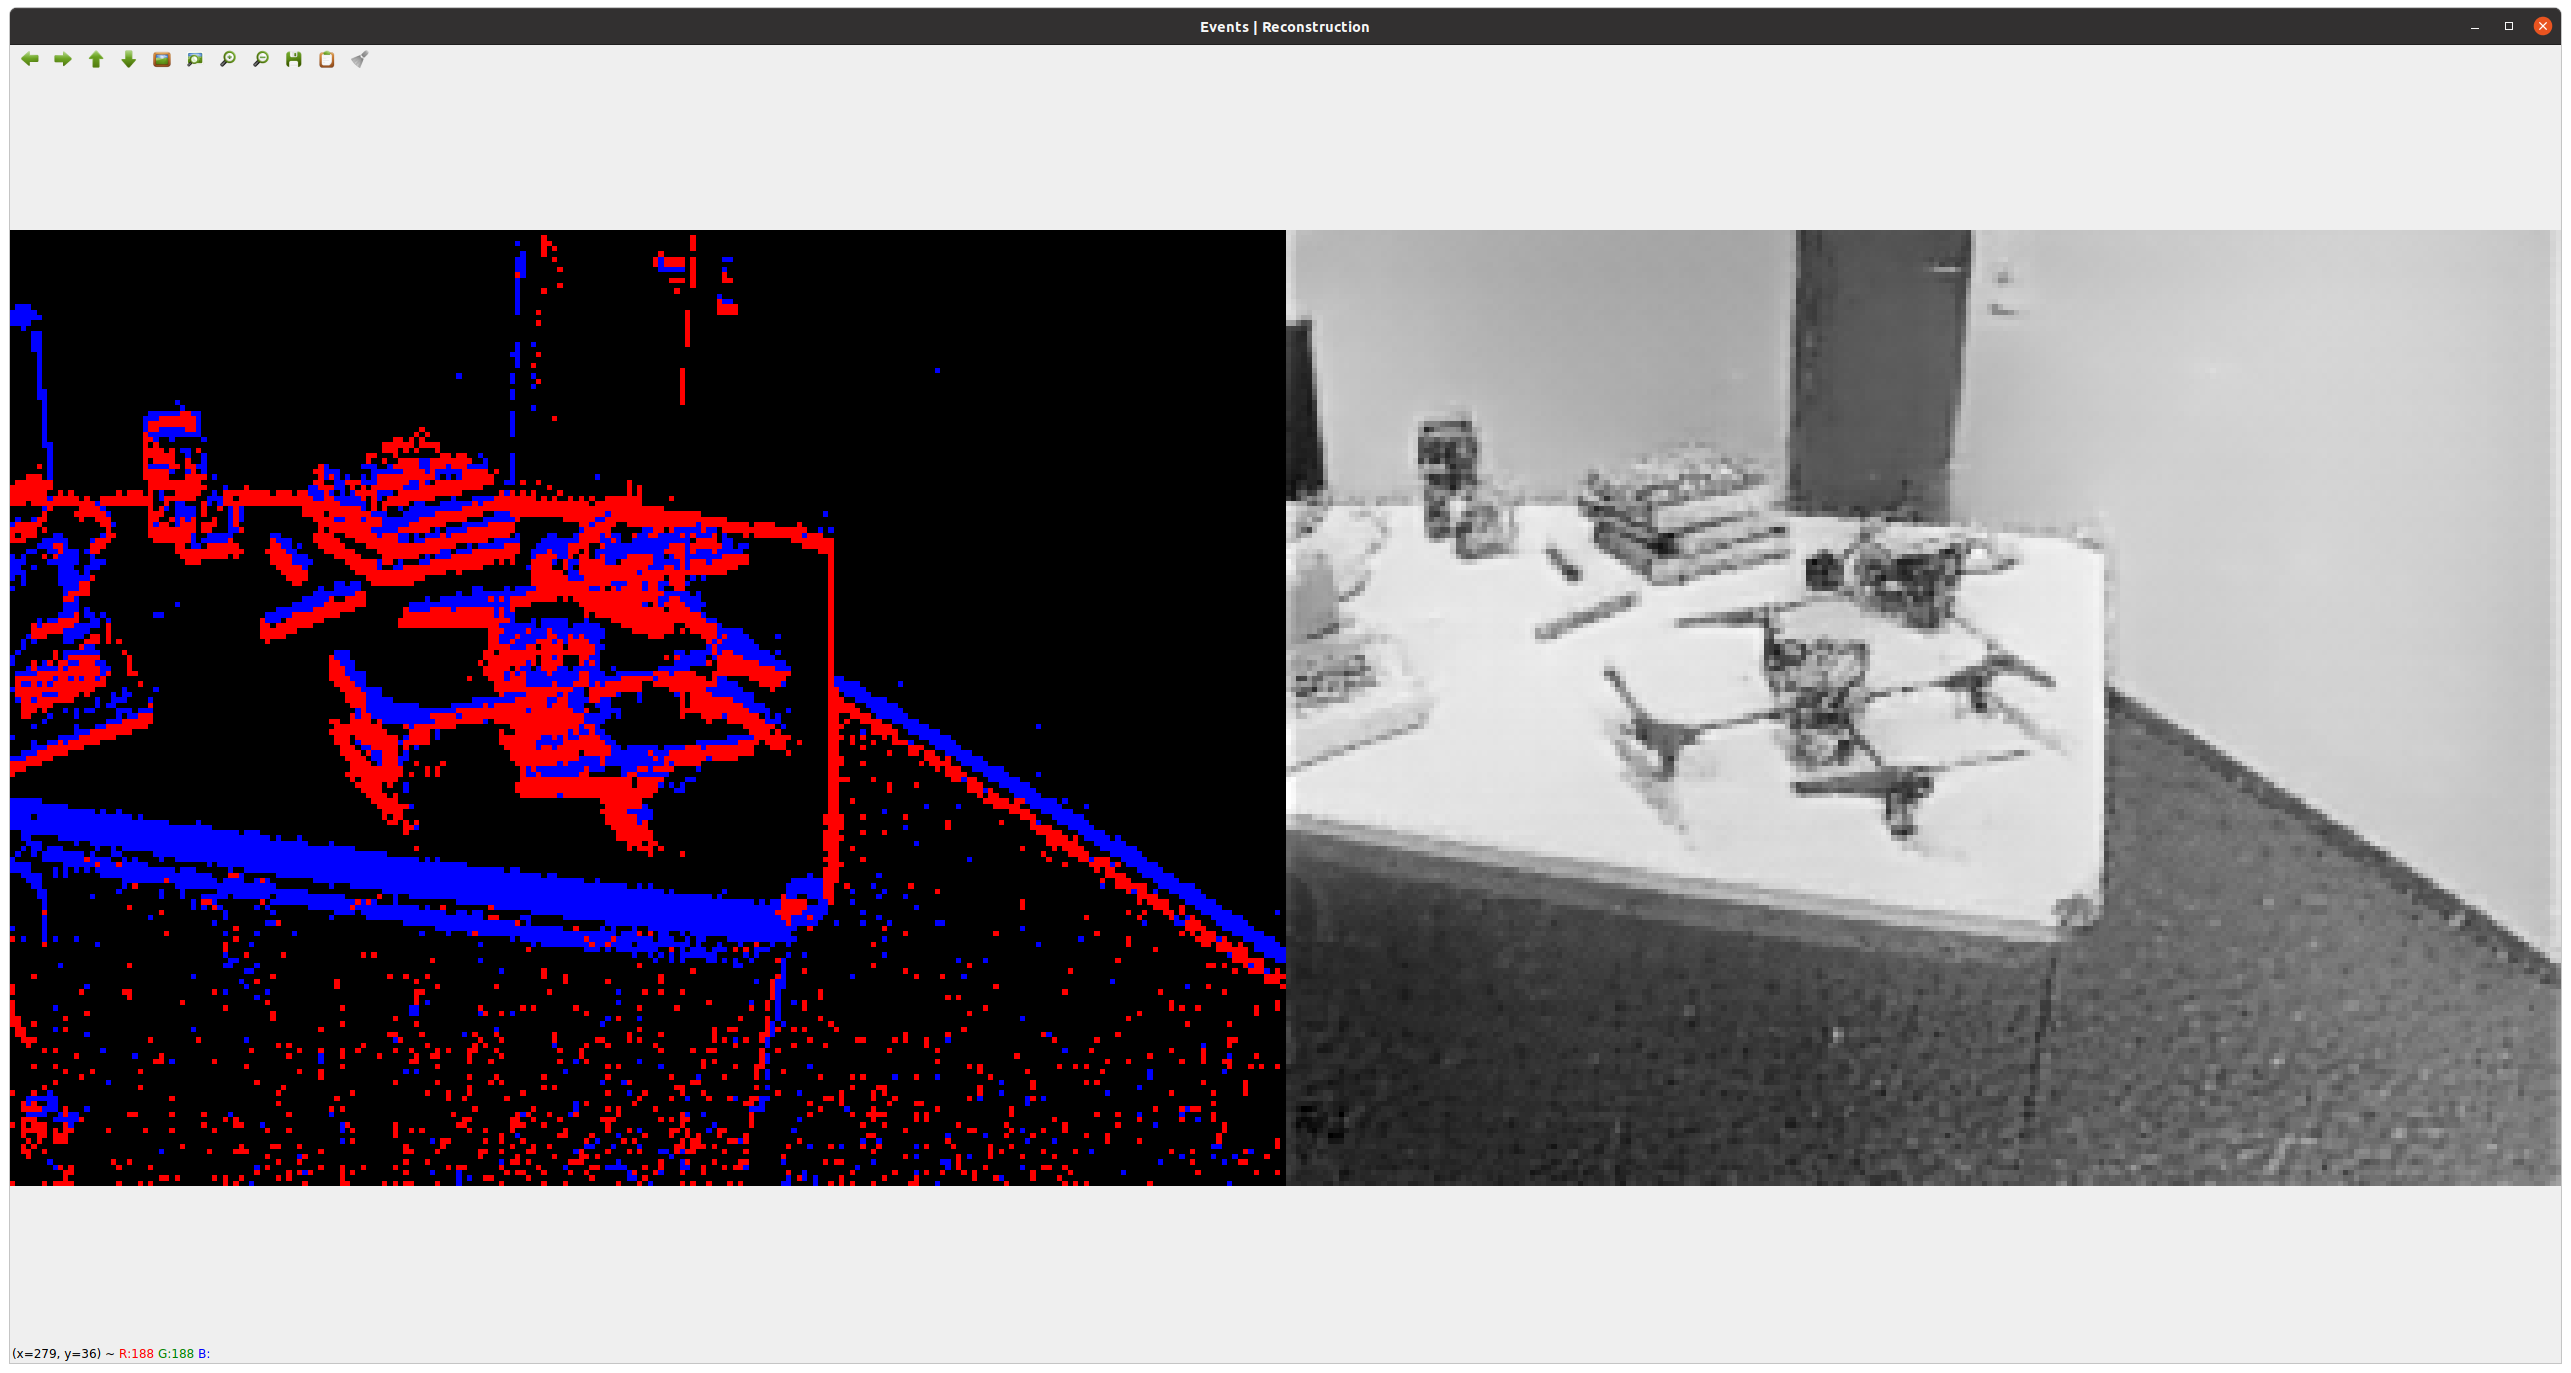
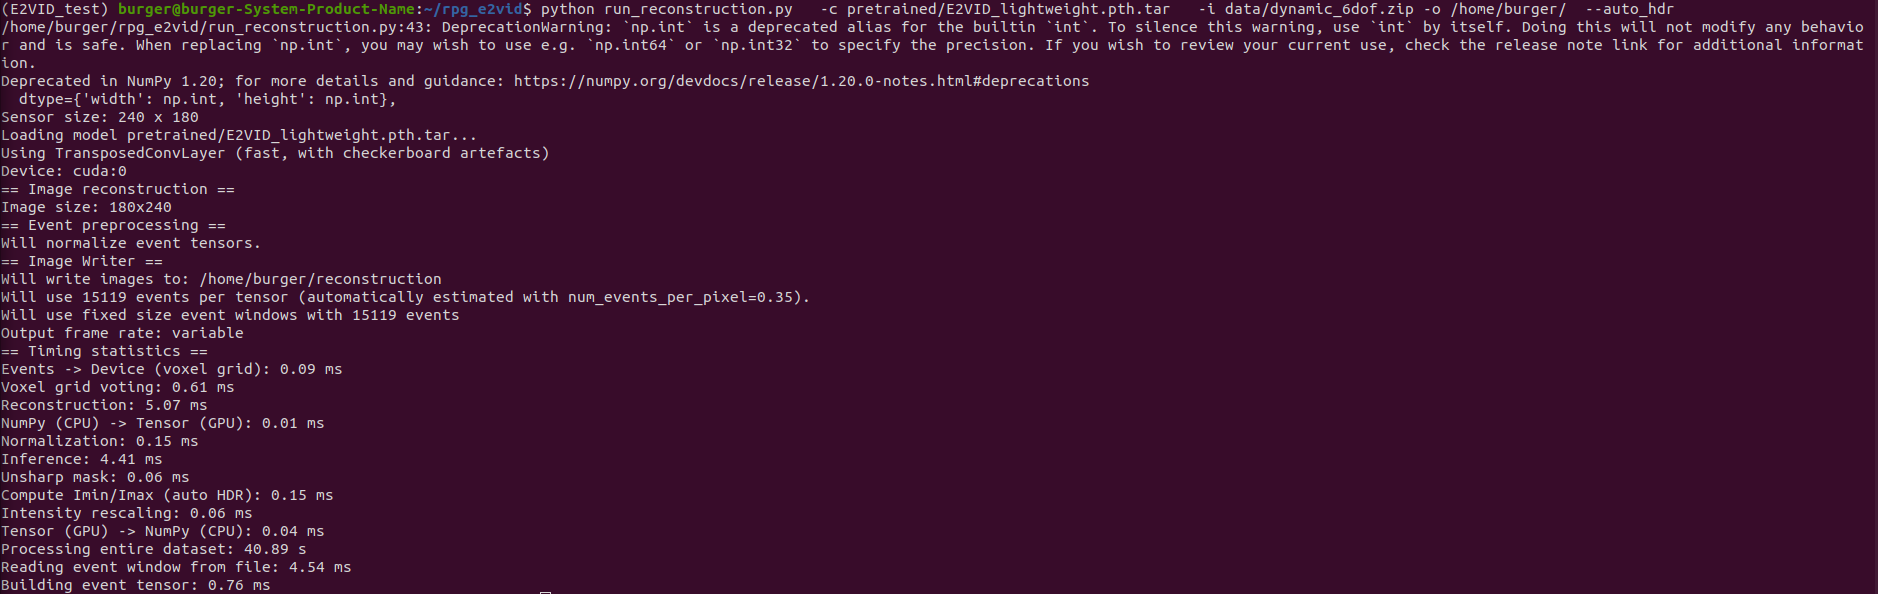
conda activate E2VID git clone https://github.com/uzh-rpg/rpg_e2vid.git # Download the pretrained model cd rpg_e2vid/pretrained wget "http://rpg.ifi.uzh.ch/data/E2VID/models/E2VID_lightweight.pth.tar" # Download an example file with event data cd ../data wget "http://rpg.ifi.uzh.ch/data/E2VID/datasets/ECD_IJRR17/dynamic_6dof.zip" # Run reconstruction python run_reconstruction.py \ -c pretrained/E2VID_lightweight.pth.tar \ -i data/dynamic_6dof.zip \ --auto_hdr \ --display \ --show_events
E2VID 사용을 위한 분석
python run_reconstruction.py -c pretrained/E2VID_lightweight.pth.tar -i data/dynamic_6dof.zip --auto_hdr --display --show_events명령어를 보면 run_reconstruction 프로그램에서 -c 옵션으로 pretrained 모델을 가져오고 -i 옵션으로 데이터를 가져온다. —auto_hdr 옵션으로 Intencity의 min, max를 자동으로 계산한다.
⭐data의 dynamic_6dof.zip은 t,x,y,p의 이벤트 기록이다.
rpg_dvs_ros의 dvs_file_writter에서 script 폴더의 extract_davis_bag_files.py를 사용해 이벤트 txt 생성.
내 데이터 event txt→image 만들기
0.rosbag→ text file→zip file
cd ~/rpg_e2vid/scripts python extract_events_from_rosbag.py /home/burger/eventVO/indoor_1226.bag --output_folder=/home/burger/ --event_topic=/dvs/events결과물로 text파일과 zip이 똫 하고 나온다.
1. zip file(text)→image reconstruction
conda activate E2VID_test python run_reconstruction.py -c pretrained/E2VID_lightweight.pth.tar -i data/outdoor_1228_straight.zip -o /home/burger/ --auto_hdr
자꾸 센서 사이즈가 안읽힌다 해서 dynamic_6dof.txt를 열어서 보니까
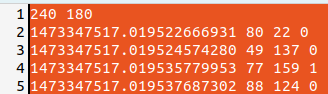
처음에 센서 사이즈를 정해주네!!!→ 얘는 해결. 나는
346 260으로 수정해야 한다.
- 모델은 pretrained- lightweight를 사용
- num_events_per_pixel = 0.35
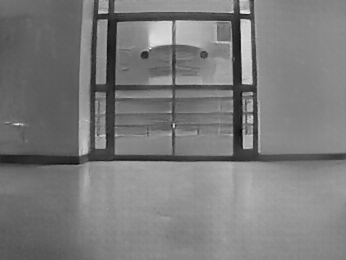
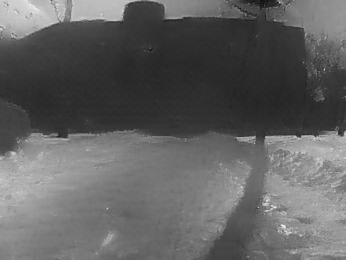
실내 직진-회전 주행 결과


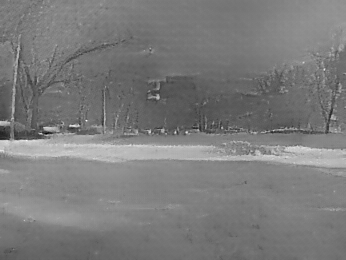
실외-직진 결과


실외 주행 결과


'Study > event-based camera' 카테고리의 다른 글
| e2calib 설치 및 사용 (2) | 2023.03.06 |
|---|---|
| HASTE 설치 (0) | 2023.01.12 |